In modern automation, the ability to visualize data and connect different protocols is just as important as the logic itself. Node-RED is an open-source, flow-based programming tool that allows you to create professional “Dashboards” (HMIs) and manage data without writing thousands of lines of complex code.
1. What is Node-RED?
Node-RED was originally developed by IBM as a way to connect hardware devices to web services. It uses a “Low-Code” approach where you drag and drop Nodes (functional blocks) onto a canvas and wire them together to create a Flow.
For a Logic Hobbyist, it is the perfect tool to:
- Create a web-based dashboard for your Arduino or ESP32.
- Bridge Modbus data from a PLC to a modern database.
- Send email or Telegram alerts when a sensor reaches a certain threshold.
2. Installation: Running it on Your Computer
Since you have a PC, the easiest way to start is by installing Node-RED locally. Node-RED runs on Node.js, so follow these steps:
- Install Node.js: Download the “LTS” version from nodejs.org.
- Install Node-RED: Open your command prompt (CMD) and type:
npm install -g --unsafe-perm node-red - Start the Engine: Type
node-redin your terminal. You will see a URL likehttp://127.0.0.1:1880. - Open the Editor: Paste that URL into your web browser.
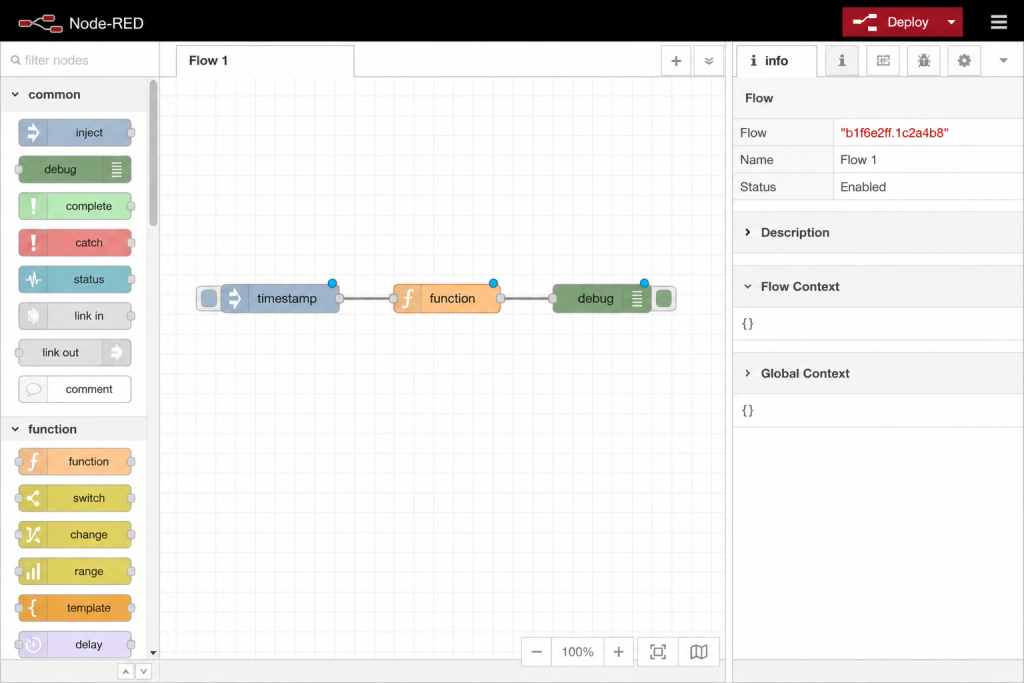
3. Understanding the Interface
- The Palette (Left): This contains all your nodes (Inputs, Outputs, Logic, Functions).
- The Canvas (Middle): This is where you drag nodes and connect them with “wires.”
- The Sidebar (Right): Shows information about selected nodes and a Debug tab to see your data in real-time.
4. Your First Flow: The “Hello Logic” Test
To understand how data flows, try this simple test:
- Drag an Inject node onto the canvas (this is your trigger).
- Drag a Debug node onto the canvas (this is your monitor).
- Wire them together.
- Click the red Deploy button at the top right.
- Click the button on the left of the Inject node. Look at the Debug tab—you’ve just triggered your first digital signal!
5. Why Node-RED is Essential for Industry
While hobbyists use it for smart homes, industrial engineers use it for IIoT (Industrial Internet of Things). By installing extra nodes (via the “Manage Palette” menu), you can add support for:
- Modbus TCP/RTU: To talk to PLCs.
- MQTT: The standard protocol for cloud-based automation.
- Dashboard: To create buttons, gauges, and charts for operators.
"While the Node-RED dashboard shows you the data, you still need to ensure your physical sensors are safe. If you're working with pneumatic systems, make sure to use our Bar to PSI Pressure Converter to verify your gauge readings before scaling them in software."
🚀 Level Up Your Logic
Now that you have Node-RED running, you need a way to trigger real-world hardware.
Read: Using Transistors as Switches →What to read next:
Build your full industrial lab for €0.
The Essential Free Software List →Don’t guess your pneumatic math.
Pressure Conversion Tool →